The Ultimate Guide to Thriving Indoor Plants: Care Tips for Every Home
Transform your living space into a green oasis with healthy, happy houseplants.
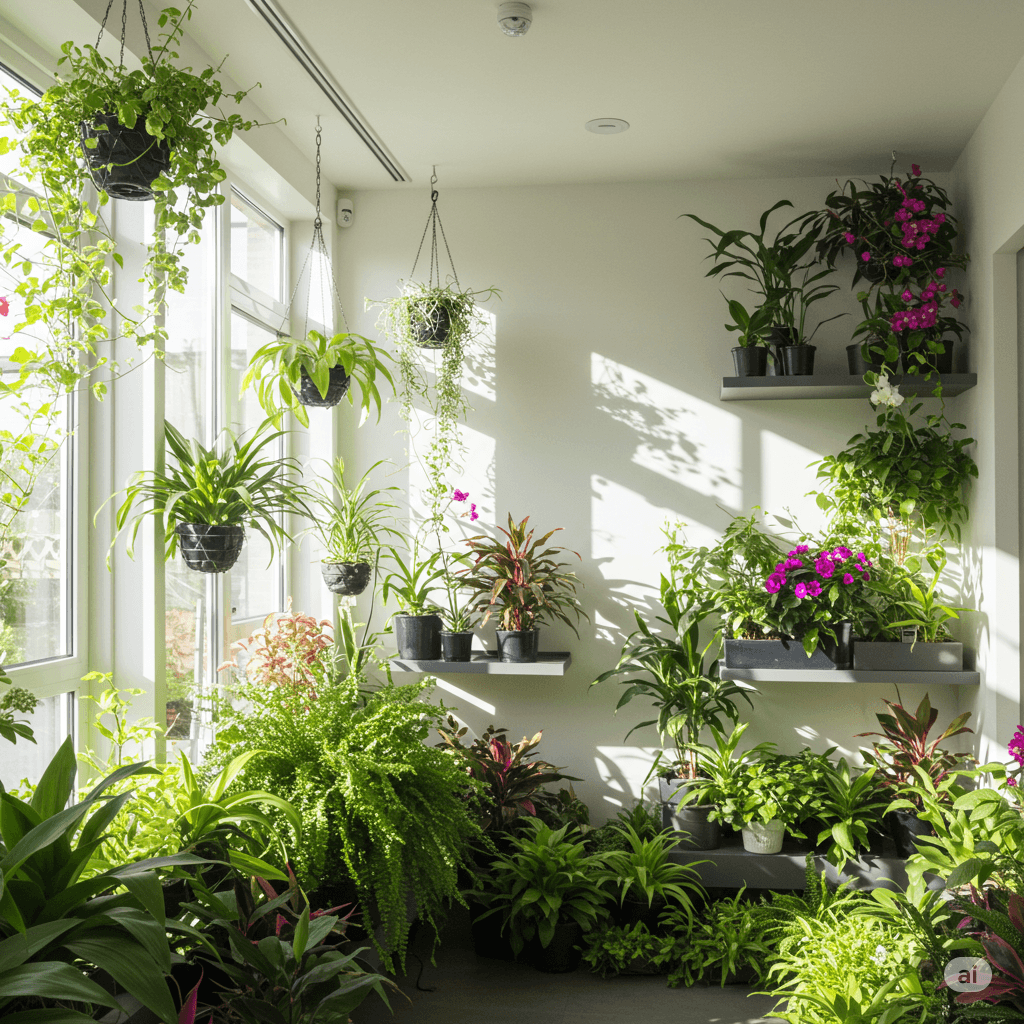
Bringing the outdoors in with houseplants does more than just beautify your space; it can boost your mood, purify the air, and create a calming atmosphere. But transforming your home into a lush jungle requires more than just good intentions. Understanding the fundamental needs of your green companions is key to helping them not just survive, but truly thrive. Whether you're a seasoned plant parent or just starting your indoor gardening journey, this comprehensive guide will walk you through the essential aspects of indoor plant care.
From deciphering light levels to mastering the art of watering, choosing the right soil, and tackling common pests, we'll cover everything you need to know. Get ready to cultivate your green thumb and enjoy the rewarding experience of watching your indoor plants flourish!
Section 1: Choosing the Right Plant - Setting Yourself Up for Success
The journey to successful plant parenthood begins with selecting a plant that suits your home environment and lifestyle. Not all plants are created equal, and matching a plant to the conditions you can provide is the most crucial first step.
Assess Your Light
Before you even browse for plants, take stock of the natural light in your home. Observe different rooms at various times of the day. Are there bright, sunny windows? Or mostly shadier spots? We'll delve deeper into light levels in the next section, but having a general idea is essential for choosing compatible plants.
Consider Your Experience Level
Be honest about the time and attention you can dedicate. If you're a beginner or have a busy schedule, start with forgiving, low-maintenance plants.
- Beginner-Friendly Champions: Snake Plant (Sansevieria), ZZ Plant (Zamioculcas zamiifolia), Pothos (Epipremnum aureum), Spider Plant (Chlorophytum comosum), Cast Iron Plant (Aspidistra elatior). These are known for their tolerance of lower light, infrequent watering, and general neglect.
- Intermediate Options: Peace Lily (Spathiphyllum), Philodendrons, Dracaena species, Rubber Plant (Ficus elastica). These might require slightly more specific care but are still relatively robust.
- For the More Adventurous: Fiddle Leaf Fig (Ficus lyrata), Calathea species, Orchids, Alocasia species. These often have more demanding light, humidity, or watering needs.
Space and Size
Think about where the plant will live. Do you have floor space for a large statement plant, or are you looking for something for a shelf or windowsill? Consider the plant's mature size – that cute little succulent could eventually need much more room.
Pets and Children
Many common houseplants are toxic if ingested by pets or children. If you have curious cats, dogs, or little ones, research plant toxicity before buying. The ASPCA website has an extensive list of toxic and non-toxic plants. Safe options include Spider Plants, Prayer Plants (Maranta), Haworthia succulents, Areca Palms, and Boston Ferns.
Read Plant Tags and Research
Don't just buy a plant because it looks pretty. Read the care tag (if available) and do a quick online search for its specific needs regarding light, water, and soil. This small effort upfront can save a lot of guesswork later.
Section 2: Let There Be Light (But Not Too Much!) - Understanding Light Needs
Light is arguably the most critical factor for indoor plant health, as it's how they produce energy through photosynthesis. Providing the *right amount* of light is essential.
Decoding Light Levels
Indoor light is often categorized as follows:
- Low Light: Areas far from windows, north-facing windows, or corners of rooms. Plants may survive here, but growth will be slow. Tolerant plants: Snake Plant, ZZ Plant, Cast Iron Plant, some Pothos varieties.
- Medium Light: Near an east-facing window, or several feet back from a south- or west-facing window. Light is bright but not direct sun for most of the day. Many popular houseplants thrive here: Philodendrons, Dracaena, Spider Plants, Peace Lilies.
- Bright Indirect Light: Close to a south- or west-facing window but shielded from direct sun by a sheer curtain, blinds, or positioned just outside the direct rays. This is the sweet spot for a vast number of tropical plants: Fiddle Leaf Figs, Monsteras, Rubber Plants, Prayer Plants, most Ferns.
- Direct Light (Bright Light): Several hours of direct, unfiltered sunlight, typically near a south- or west-facing window. Ideal for sun-loving plants: Cacti, Succulents, Crotons, Bird of Paradise. Be aware that intense afternoon sun can scorch the leaves of many plants not adapted to it.
Positioning Your Plants
- Window Direction Matters: North-facing windows provide the least light. East-facing windows offer gentle morning sun (good medium/bright indirect). South-facing windows provide strong, bright light all day. West-facing windows offer intense afternoon sun.
- Distance from Window: Light intensity drops dramatically with distance. A plant a few feet away receives significantly less light than one right on the windowsill.
- Obstructions: Trees, buildings, eaves, or even sheer curtains significantly reduce light levels.
Signs of Improper Lighting
- Too Little Light: Leggy growth (long stems with few leaves), small leaves, pale green or yellowing leaves (especially older ones), lack of flowering, leaning towards the light source.
- Too Much Light: Scorched brown or yellow patches on leaves, crispy leaf edges, faded leaf color, wilting even when watered.
Tip: Rotate your plants regularly (e.g., a quarter turn each time you water) to ensure all sides receive light and promote even growth.
Section 3: H2O Know-How - Mastering the Art of Watering
Watering issues – specifically overwatering – are perhaps the most common cause of indoor plant demise. Finding the right balance is crucial for root health and overall plant vitality.
Why Proper Watering Matters
Plant roots need a balance of moisture and oxygen. Overwatering saturates the soil, cutting off oxygen supply, leading to root rot (a fungal disease that kills roots). Underwatering stresses the plant, hindering growth and causing wilting or leaf drop.
Ditch the Schedule, Check the Soil!
The biggest mistake is watering on a fixed schedule (e.g., "every Saturday"). A plant's water needs fluctuate based on light, temperature, humidity, pot size, soil type, and growth rate. Instead, learn to check the soil moisture:
- The Finger Test: Stick your index finger into the soil up to the first or second knuckle. If it feels dry at that depth, it's likely time to water. If it feels moist, wait longer.
- Moisture Meter: A simple tool you insert into the soil to get a reading (dry, moist, wet). Can be helpful, especially for larger pots, but always use it as a guide alongside your own judgment.
- Pot Weight: Learn the weight difference between a freshly watered pot and a dry one. Lift the pot – if it feels significantly lighter than usual, it probably needs water.
Watering Techniques
- Top Watering: Pour water slowly and evenly over the soil surface until it drains freely from the bottom drainage holes. This ensures the entire root ball is moistened and helps flush out excess salts. Discard any water that collects in the saucer after 15-30 minutes; don't let the plant sit in standing water.
- Bottom Watering: Place the pot in a sink or basin filled with a few inches of water. Allow the plant to soak up water through the drainage holes for 15-30 minutes, or until the topsoil feels moist. This encourages deeper root growth and is great for plants sensitive to wet leaves (like African Violets).
Factors Affecting Watering Frequency
- Light: Plants in brighter light use more water.
- Temperature & Humidity: Warmer temps and lower humidity increase water needs.
- Pot Type & Size: Terracotta pots dry out faster than plastic or glazed ceramic. Smaller pots dry out faster than larger ones.
- Soil Type: Well-draining mixes dry faster than dense, water-retentive ones.
- Time of Year: Plants typically need less water during dormant periods (fall/winter) when growth slows.
Signs of Watering Issues
- Overwatering: Yellowing lower leaves, mushy stems, wilting (despite moist soil), moldy soil surface, fungus gnats, root rot (brown, mushy roots).
- Underwatering: Wilting, dry/crispy leaf edges, brown leaf tips, drooping leaves, slow growth, soil pulling away from the pot edges.
Water Quality Tip: Tap water is usually fine, but if yours is very hard (high mineral content) or treated with chlorine/fluoride, letting it sit out overnight can help dissipate some chlorine. Using filtered or rainwater is ideal if you notice mineral buildup or sensitivity.
Section 4: Getting Your Hands Dirty - Soil, Pots, and Repotting
The right foundation is essential. Choosing appropriate potting mix and containers, and knowing when to repot, provides the support and environment your plant's roots need to thrive.
The Importance of Good Potting Mix
Avoid using garden soil for indoor plants! It's too dense, compacts easily, doesn't drain well, and can harbor pests and diseases. Use a quality commercial potting mix specifically designed for houseplants.
- Components: Most mixes contain peat moss or coco coir (for moisture retention), perlite or pumice (for aeration and drainage), vermiculite (moisture and nutrient retention), and sometimes compost or worm castings (for nutrients).
- Specialty Mixes: You can find mixes tailored for specific plant types:
- Cactus/Succulent Mix: Very gritty and fast-draining, often containing more sand or perlite.
- Orchid Mix: Very chunky, usually bark-based, providing maximum aeration for orchid roots.
- African Violet Mix: Light, airy, and moisture-retentive but well-draining.
- DIY Mixes: As you gain experience, you can create custom mixes by combining ingredients like standard potting soil, perlite, orchid bark, coco coir, charcoal, and worm castings to suit specific plant needs.
Choosing the Right Pot
- Drainage is Non-Negotiable: Ensure the pot has drainage holes at the bottom. Without them, water accumulates, leading to root rot. If you love a decorative pot without holes (a cachepot), keep the plant in its plastic nursery pot with drainage and place that inside the cachepot. Remove the inner pot for watering or empty the cachepot shortly after.
- Size Matters: Don't put a small plant in a huge pot. Excess soil holds moisture for too long, increasing rot risk. When repotting, typically choose a pot only 1-2 inches larger in diameter than the current one.
- Material Considerations:
- Terracotta (Clay): Porous, allows air and moisture exchange, dries out faster. Good for succulents, cacti, and plants prone to overwatering, but requires more frequent watering.
- Plastic: Lightweight, inexpensive, retains moisture longer. Good for moisture-loving plants or if you tend to underwater.
- Glazed Ceramic: Retains moisture like plastic but is heavier and often more decorative.
Repotting: When and How
Plants eventually outgrow their pots or deplete the nutrients in their soil. Repotting provides fresh soil and more room for roots.
- Signs It's Time: Roots growing out of drainage holes, roots circling densely inside the pot (rootbound), water running straight through without soaking in, slowed growth (despite good care), plant becoming top-heavy and unstable.
- Best Timing: Spring or early summer when the plant is actively growing. Avoid repotting stressed or dormant plants.
- How to Repot:
- Water the plant thoroughly a day or two before repotting to ease removal.
- Gently tip the pot sideways and slide the plant out. If stuck, run a knife around the inside edge.
- Inspect the roots. Gently loosen any tightly bound roots with your fingers. Prune any dead, mushy, or circling roots with clean scissors.
- Add a layer of fresh potting mix to the bottom of the new, slightly larger pot (with drainage!).
- Place the plant in the new pot, ensuring the top of the root ball is about an inch below the rim.
- Fill in around the root ball with fresh potting mix, gently firming it down to remove air pockets, but don't pack too tightly.
- Water thoroughly until water drains from the bottom.
- Place the plant back in its appropriate light conditions. Avoid fertilizing for several weeks as the fresh mix has nutrients and roots need time to recover.
Section 5: Creating the Right Atmosphere - Humidity and Temperature
Many popular houseplants originate from tropical regions with high humidity and stable temperatures. Replicating these conditions, or at least mitigating the dry air common in homes (especially with heating/cooling systems), can significantly benefit your plants.
Ideal Temperature Ranges
Most common houseplants thrive in typical indoor temperatures between 65-75°F (18-24°C). Avoid placing plants near extreme temperature fluctuations:
- Drafty windows or doors
- Heating vents or radiators
- Air conditioning units
- Sudden temperature drops below 50-55°F (10-13°C) can damage many tropical plants.
The Importance of Humidity
Indoor air, particularly in winter when heating systems run, is often much drier than ideal for tropical plants. Low humidity can cause:
- Brown, crispy leaf tips and edges
- Yellowing leaves
- Stunted growth
- Increased susceptibility to pests like spider mites.
Ways to Increase Humidity
- Grouping Plants: Plants naturally release moisture through transpiration. Grouping them together creates a more humid microclimate.
- Pebble Trays: Place the pot on a tray filled with pebbles and water. Ensure the bottom of the pot sits on the pebbles, *above* the water level, so it's not soaking. As the water evaporates, it increases humidity around the plant.
- Misting: Spraying leaves with water provides a *temporary* humidity boost. It needs to be done frequently (often multiple times a day) to be truly effective and isn't ideal for plants prone to fungal issues or those with fuzzy leaves (like African Violets).
- Humidifiers: A small room humidifier placed near your plants is one of the most effective ways to consistently raise humidity levels.
- Location Choice: Bathrooms and kitchens often have naturally higher humidity levels, making them good locations for humidity-loving plants (provided light is adequate).
Plants that Crave Humidity: Ferns, Calatheas, Marantas (Prayer Plants), Alocasias, Orchids, Air Plants (Tillandsia).
Plants Tolerant of Lower Humidity: Cacti, Succulents, Snake Plants, ZZ Plants, Cast Iron Plants, Pothos.
Section 6: Plant Nutrition - Feeding Your Green Friends
While potting mix provides initial nutrients, plants eventually use them up. Fertilizing replenishes essential minerals needed for healthy growth, strong leaves, and vibrant flowers.
Why Fertilize?
Fertilizers provide macronutrients (Nitrogen - N, Phosphorus - P, Potassium - K) and micronutrients (iron, magnesium, manganese, etc.) that plants need for various functions like chlorophyll production, root development, and flowering.
Types of Fertilizers
- Liquid Fertilizers: Mixed with water and applied during watering. Provide nutrients quickly but need regular application. Easy to control dosage.
- Granular Slow-Release Fertilizers: Pellets mixed into the soil or sprinkled on top. Release nutrients gradually over weeks or months as you water. Convenient but harder to control precise dosage.
- Fertilizer Spikes/Sticks: Inserted into the soil. Release nutrients over time, but distribution might not be even throughout the root zone.
- Organic Options: Worm castings, compost tea, fish emulsion. Generally release nutrients more slowly and improve soil health. Can sometimes have an odor (fish emulsion).
Understanding N-P-K Ratios: Fertilizer labels show three numbers (e.g., 10-10-10 or 5-10-5). These represent the percentage by weight of Nitrogen (leaf growth), Phosphorus (root/flower/fruit development), and Potassium (overall plant health). A balanced fertilizer (like 10-10-10) is suitable for many houseplants. Formulas higher in nitrogen promote foliage, while those higher in phosphorus encourage blooms.
When and How Often to Feed
- Growing Season is Key: Most houseplants benefit from feeding during their active growing season (typically spring and summer).
- Reduce or Stop in Fall/Winter: As growth slows, nutrient needs decrease. Stop fertilizing or reduce frequency significantly during dormancy.
- Follow Label Instructions: Dosage and frequency vary by product. It's crucial to follow the directions on the fertilizer package.
- Less is More: It's better to under-fertilize than over-fertilize. Over-fertilizing can burn roots and damage the plant. Many experts recommend diluting liquid fertilizers to half or quarter strength of the recommended dose, especially if feeding frequently.
- Don't Fertilize Stressed Plants: Avoid feeding newly repotted, diseased, pest-infested, or severely underwatered plants. Let them recover first.
Signs of Nutrient Issues
- Deficiency: Slow/stunted growth, pale or yellowing leaves (especially older ones), lack of flowering.
- Excess (Fertilizer Burn): Brown leaf tips/edges, white crusty buildup on soil surface or pot rim, wilting, root damage. Flush the soil thoroughly with water if you suspect over-fertilization.
Section 7: Tidy Up Time - Pruning and General Maintenance
Regular upkeep keeps your plants looking their best, encourages healthy growth, and helps prevent problems.
Benefits of Pruning
- Removes Dead/Yellowing Leaves: Improves appearance and prevents potential disease spread.
- Encourages Bushier Growth: Pinching back tips on vining or branching plants (like Pothos, Philodendrons) encourages side shoots, resulting in a fuller plant.
- Controls Size/Shape: Keep plants from getting too large or leggy.
- Promotes Flowering: Removing spent blooms (deadheading) can encourage some plants to produce more flowers.
How to Prune
- Use Clean, Sharp Tools: Use sharp scissors, pruners, or even your fingernails (for soft stems). Clean tools with rubbing alcohol between plants, especially if removing diseased parts.
- Cut Above a Node: When trimming stems, make the cut just above a node (the point where a leaf attaches or a bud forms). This is where new growth will emerge.
- Remove Yellow/Brown Leaves: Cut these off at the base of the leaf stem (petiole) or back to the main stem.
- Don't Overdo It: Avoid removing more than 25-30% of the plant's foliage at one time, as this can stress it.
Cleaning Leaves
Dust accumulating on leaves blocks light and can harbor pests. Clean leaves regularly:
- Wipe Gently: Use a soft, damp cloth or sponge to wipe down smooth leaves. Support the leaf from underneath with your other hand.
- Shower Power: Give plants a gentle lukewarm shower in the sink or bathtub occasionally to wash away dust. Avoid this for fuzzy-leaved plants.
- Soft Brush: Use a soft brush (like a makeup brush) for fuzzy leaves (e.g., African Violets).
Other Maintenance Tasks
- Check for Pests Regularly: Inspect leaves (especially undersides), stems, and soil when watering. Early detection is key.
- Rotate Plants: Ensure even growth by giving plants a quarter turn regularly.
- Provide Support: Stake or trellis climbing or top-heavy plants as needed.
Section 8: Troubleshooting - Common Pests and Problems
Even with the best care, problems can arise. Knowing how to identify and address common issues is part of being a plant parent.
Common Indoor Pests
Inspect new plants carefully before bringing them home! Isolate any infested plants immediately to prevent spreading.
- Spider Mites: Tiny arachnids, often hard to see. Look for fine webbing between leaves/stems, stippling (tiny yellow/white dots) on leaves. Thrive in dry conditions.
- Treatment: Increase humidity, wipe leaves thoroughly, spray forcefully with water, use insecticidal soap or neem oil. Repeat treatments are necessary.
- Mealybugs: Small, white, cottony-looking insects often found in leaf axils or on stems. They suck sap.
- Treatment: Dab individual bugs with a cotton swab dipped in rubbing alcohol (test on a small area first). Wipe leaves, spray with insecticidal soap or neem oil.
- Scale: Look like small, immobile bumps (tan, brown, or black) on stems and leaves. They have a hard, protective coating.
- Treatment: Scrape off gently with a fingernail or toothbrush. Treat with horticultural oil or neem oil (which suffocates them). Systemic insecticides may be needed for heavy infestations.
- Fungus Gnats: Small, dark flies resembling fruit flies, often seen flying around the soil surface. Larvae live in moist topsoil and feed on fungi/organic matter (and sometimes roots). Usually indicate overwatering.
- Treatment: Let the top few inches of soil dry out completely between waterings. Use yellow sticky traps to catch adults. Water with Bti (Bacillus thuringiensis israelensis) solution to kill larvae.
- Aphids: Small, pear-shaped insects (often green, black, or brown) that cluster on new growth and suck sap.
- Treatment: Strong water spray, wipe off, insecticidal soap, neem oil.
Organic Pest Control Indoors: Focus on physical removal (wiping, spraying water), rubbing alcohol for spot treatment, insecticidal soap, neem oil, and horticultural oil. Always follow label directions and test sprays on a small leaf area first.
Common Leaf Problems (and Likely Causes)
- Yellowing Lower Leaves: Often overwatering, but can also be natural aging or nitrogen deficiency.
- Brown Crispy Leaf Tips/Edges: Usually low humidity, underwatering, or salt buildup from fertilizer/hard water.
- Brown/Black Mushy Spots: Likely overwatering or fungal disease (often related to overwatering).
- Pale/Faded Leaves: Too much direct light or sometimes nutrient deficiency.
- Wilting: Most often underwatering, but can *also* be caused by overwatering (due to root rot preventing water uptake). Always check soil moisture!
- Leaf Drop: Can be caused by sudden changes in light, temperature, watering, drafts, or repotting shock.
Troubleshooting often involves reviewing the basics: light, water, humidity, and checking for pests. Adjust care accordingly.